
Setting Up Your Project
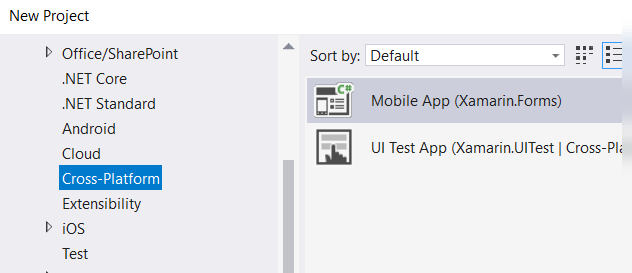
In my Xamarin Forms vs PWA experiment, I thought I would get started with Xamarin Forms first. The first thing we are going to do is create the project. For those that don’t know, you can find the Xamarin Forms project templates under cross-platform in the category tree on the left.
Next you will have to select the type of project. I prefer to use the blank app template and the platforms depend on what I am doing. I find that even if I don’t need a UWP app, I select it anyways as I find it easiest for debugging. I am also a fan of using the standard library for the common code instead of the shared project: you are only compiling the shared project once instead of including it to be compiled for each of the clients. But both work so use whatever you prefer.

Alright, so after we let it restore all of the necessary packages, we can get started. If you have read any of my other posts, you know that I am a big fan of the work that the team with Prism Library do, and back it up with a Patreon pledge (if you love Prism, you should consider it as well). So the next step will be to setup Prism with my app.
Adding Prism
The easiest thing to do here is obviously to use NUGET to add Prism to your project. You can search for Prism.Unity and that will bring in the packages that use Unity.Container as the dependency injection container.
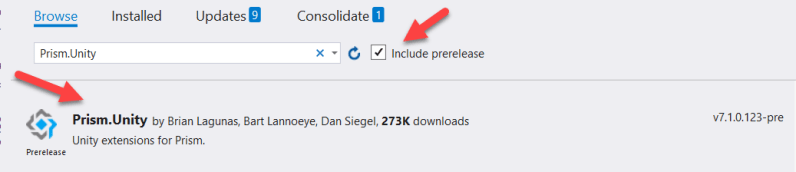
I should note here that I am going to use the pre-release version of the packages. As such, I am going to go to the GitHub repository and download the packages and use them in my workspace. Go to the 7.1.0-Pre tag to download the latest that I used. Why would I download and include the projects manually? If you haven’t done this before, I would recommend trying it sometime with a library of your choice. If you are relying on a package of some kind, I think it is a good idea to have at least a base understanding of how things are working within the code that you are relying on. And if something isn’t working as expected, it is pretty easy to step right into the library code itself and see what is going on. This is the first time that I have used the 7.x version of Prism so I want to see what the changes are.
If you do download the source and add it to your project manually, you will have to include the projects in your solution. Once they are in the solution, remember to go the core project and each of the platform projects and add them as project references.
Bootstrapping Your App
If you have done any Xamarin Forms projects in the past, you know that there is an Application object that is used to start up your app. This object is contained in the core project common to all the platforms. We are going to change our Application object to derive from the PrismApplication object. If you are poking around, you will probably find a PrismApplicationBase object in the Prism.Forms assembly and a PrismApplication object in the Prism.Unity.Forms assembly. We want to use the one that is derived for the container of our choice: Unity.Container.
Head on over to your core project and open up the App.xaml file. You are going to need to update the root tag to be PrismApplication and do that you will need to add the appropriate namespace to the XAML namespace declarations. Your XAML would then look like the following:
Don’t forget the code behind. In addition to change the base class, Prism imposes a pair of methods that you must define: RegisterTypes and OnInitialized. First, let’s fix up the class declaration and the constructor. For now, ignore the IPlatformInitializer, we will talk more about that in another post.
public partial class App : PrismApplication
{
    public App(IPlatformInitializer initializer = null)
        : base(initializer)
    {
    }

    /// ...
}
The RegisterTypes method is used to register all the navigation pages that the navigation service uses and all of the services that you want to consume in your app. An example might be the service that calls an external web api. Although we haven’t gotten to that point yet, this sample project will call a web api that gets data from the local transit authority. We will see that a bit later.
For now, all we want to do is to register our pages for navigation, of which we only have one.
protected override void RegisterTypes(IContainerRegistry containerRegistry)
{
    containerRegistry.RegisterForNavigation("main");
}
That was pretty easy. If we had a view model for our MainPage defined yet, we could also register it as part of the above call. And then whenever the navigation service created the page, it would also create the view model and inject it for us.
Next, we look at the OnInitialized function. This gets called after all of the initialization has happened and your app is ready to show the first page. For us it will be very simple, we just call the base class InitializeComponent method and then ask the navigation service to go the first page.
protected override void OnInitialized()
{
    InitializeComponent();
    NavigationService.NavigateAsync("main");
}
In the above, the NavigationService looks for the page type that you registered against the “main” key, creates it and pops it up on to the Xamarin Forms navigation stack. Just to make sure everyone grasps the coolness part of the navigation service, you perform your navigation using arbitrary strings, therefore your objects are not coupled together and it is dead easy to swap in new pages without affecting the rest of your code.
Excellent! This should get you going with a shell app that you can run on each of the platforms that you created for. Once caveat though: I sometimes find Visual Studio to be a bit finicky when you start changing the XAML base class in the app object. I usually find that some combination of cleaning the solution and restarting Visual Studio clears this up, so be aware of that. Since I specified a UWP project as well, I haven’t tried to open it up in Visual Studio for Mac to see if that is less fragile. Once Visual Studio wraps its mind around it though, you should be good to go.
Next thing we will look at is adding in our master/detail, hamburger menu and place holder pages for the different options on the menu.
